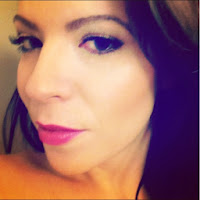
March 29, 2014

some recent work.

while I always post my work on my Instagram page [@liannemascia], I haven't posted anything on here yet so I felt it was time. 


[first look: green smokey eyes]


[second look: soft pretty bridal]


[third look: 60's inspired vintage glam]


[fourth look: sweet 16 glitter eyes]


[fifth look: fresh and natural]


March 28, 2014

inject some radiant orchid into your beauty routine!

Soooo in case you missed it, "Spring" arrived last weekend and I figured I would "celebrate" the occasion by heading over to Shoppers and picking out some new products in Pantone's beautiful colour of the year "Radiant Orchid". Over an hour later I emerged with a bag of goodies and have shared my reviews below.

[And because I can't just go into Shoppers and buy only what I went in there for, I also picked up Rapid Brow eyebrow growth serum and started the treatment... Wait and see if I have "Uncle Leo" eyebrows by this time next month!]


1] Fuse by Sensationail gelnamel in "Emotion"

Ok, when I first learned my #1 at-home beauty regimen was about to get a whole lot easier and FASTER I almost died of excitement. By eliminating the base and top coat steps of my gel polish mani, my time investment went from 1 hour to 15 minutes! I couldn't wait to try Fuse and low and behold it came in the colour I was looking for. Sold. Well, as the old saying goes if it seems too good to be true, it probably is. And it kind of was. I ended up needing to put on a clear top coat [as some of the colour came off when I did the last step of cleansing], and it chipped within a couple of days! Not impressed Sensationail. Not impressed.


2] Covergirl LipPerfection Lipcolour in "330 - Divine"

I. LOVE. THIS. LIPSTICK. Everything about it. The colour is gorgeous, it glides on nicely, and has staying power!! Plus, the moisturizing factor prevented my lips from looking dry and crusty [which is a common complaint with some rich coloured lipsticks like this]. I usually don't purchase Covergirl products but I highly recommend this lipstick [and especially this colour] to punch up a neutral outfit!


3] Rimmel Exaggerate Waterproof Eye Liner in "270 - Purple Shock"

I really liked how this product glided on my eye, and stayed put for hours! The bonus smudger on the other end of this pencil was a nice touch. The only complaint I have with this [and all eye pencils with this creamy texture] is it's impossible to properly sharpen... the pathetic sharpener that's included with most of these pencils is useless.


4] ESSIE Nail Polish in "Play Date"

Another nail product on the list [I can't resist anything to do with nails...]
I am in love with this gorgeous polish! It's the perfect shade for Spring, and as with all Essie polishes, the staying power is pretty good, you'll get a solid 5-7 days of minimally-chipped wear.


5] Quo Beauty Blender

Sponges better watch their back, or they soon may find themselves on the endangered species list. Enter: The beauty blender. It's the ultimate applicator, giving you a perfect, flawless foundation application! The point allows you to get into all angles of the face easily, and the best part is it doesn't drink your foundation like typical sponges do! The secret is it needs to be wetted, and this keeps the foundation from absorbing in. Some beauty blenders can be very expensive, but if you are curious and want to see what it's all about, give this one a try [it retails for $7].


6] Quo Individual Eyelash Inserts

Ok so I know technically this product is black [not Radiant Orchid], but it's packaging was, and I think eyelashes make everything better so I'm including this as something everyone should try once in a while!!!


Maybe if we all join together and pretend it's Spring and start wearing bright colours we can summon some warmer weather?? Kind of like a reverse rain dance?? Just a thought...


{ beauty tip } when wearing a bright colour [such as radiant orchid] on eyes or lips, make sure to keep the other features neutral, to have a focal point on the face and ensure your look is clean and modern!


March 9, 2014

the lost art of contouring.

What is contouring and highlighting? By definition, it's the act of shading certain features to contract or define them, and highlighting other ones to make them stand out. It can also be corrective, for example to minimize a large forehead or nose. Contouring and highlighting is an amazing sculpting tool, however if you're not careful, you could be one blend away from looking like a baby drag queen.

Kevyn Aucoin's famous contouring example from his book Face Forward.


Celebrities have been doing it for years, from Lucille Ball to more recently Kim Kardashian, and many celebrity impersonators rely on this method to help transform them into their famous alter egos.

These two pictures are the same man!


Without having years of experience or your own pro makeup artist, you can achieve a defined, polished look using basic contouring techniques and drugstore products in just a few steps.

1] Lightly apply a medium tone bronzer (preferably non-shimmer) just under your natural cheek bone on a 55 degree angle, around the edge of your jaw, and around the perimeter of your forehead.
[Product Pick: Essence Matt Bronzing Powder... for beauties on a budget!]


2] Apply a shimmer highlighting powder on your cheekbones up to your temple, under your brow bone, and middle of your forehead.
[Product Pick: Smashbox Soft Lights Shimmering Powder]


3] BLEND BLEND BLEND!!!!! 

Optional: Finish with blush on the apples of the cheeks, and your sculpting is complete!


Try adding some contouring and highlighting the next time you're glamming up for a special event... it's considerably less expensive than getting a facelift and zero down time.


{ beauty tip } light, shimmery eyeshadow applied to the inner corners of the eye is a great way to highlight the eye area and make eyes appear wider and more awake... "verve" from the NAKED2 palette mentioned in my last post works great for this!


March 2, 2014

i've died and gone to makeup heaven.


What an amazing first two weeks it's been!! I absolutely love what I'm doing, and the instructors at the School of Pro Makeup are fantastic [and hilarious... looking at you Rob]. Who knew there was such a science behind the art of makeup? From different skin types and skin tones, to the best shadow and liner for your eye shape, there is definitely a lot to take in when someone sits in your chair. You have to know exactly what they need and sometimes you have to do it fast. Foundation is important, probably the most important element to the makeup application, so if you don't have the colour and intensity right it will throw off the whole look [it doesn't matter how amazing your NAKED smoky eye is!]

In honour of learning all the basic elements of the face this week, I have provided my current faves for each one: 

EYE: Urban Decay "NAKED2" eyeshadow palette [these taupe/greige colours allow for the perfect 'naked' to 'not-so-naked' eye!]
LIP: Gosh lipstick in "Darling" [modern nude/pink colour with a creamy texture]
CHEEK: L'Oreal "Magic Nude" liquid powder foundation [light coverage that has a fresh, flawless, powder-like finish]

If you have your own suggestions I would love to hear them, or if you have tried the ones I've suggested please leave your feedback in the comments! 


{ beauty tip } if you have a dark circle, chances are it's blue/black so you should use a cool tone "pink" concealer to cover it, even if your skin tone is warm.